
oster toaster oven user manual
The Oster Toaster Oven is a versatile and user-friendly appliance designed for efficient cooking. Recent recalls highlight the importance of safety, ensuring optimal performance and user protection. Always follow the manual for safe and effective use.
1.1 Overview of the Oster Toaster Oven
The Oster Toaster Oven is a versatile kitchen appliance designed for efficient and convenient cooking. It combines the functionality of a traditional oven with the compact size of a toaster, offering a wide range of cooking options. Recent updates and recalls, such as the French door toaster oven model, highlight Oster’s commitment to safety and performance. The appliance is ideal for toasting, baking, broiling, and convection cooking, making it a multi-functional addition to any kitchen. Its user-friendly design and advanced features ensure consistent results, while safety features like automatic shut-off and secure doors provide peace of mind. Always refer to the manual for optimal use and safety guidelines.
1.2 Key Features of the Oster Toaster Oven
The Oster Toaster Oven boasts a range of key features that enhance cooking convenience and efficiency. It includes multiple cooking modes such as toasting, baking, broiling, and convection cooking, offering versatility for various recipes. The digital control panel provides precise temperature and timer settings, while preset functions streamline the cooking process. Recent models feature a spacious interior and LED lighting for better visibility. Safety is prioritized with automatic shut-off and cool-touch handles. Additionally, the oven’s compact design saves counter space without compromising performance. Regular updates and recalls, like the French door model, ensure ongoing improvements in safety and functionality, making it a reliable choice for home cooks.
Safety Precautions
Always prioritize safety when using the Oster Toaster Oven. Be aware of recalls, such as the French door model, which may pose burn risks due to unexpected closures. Follow the manual and stay informed about updates to ensure safe operation.
2.1 General Safety Tips
Always follow general safety guidelines when using the Oster Toaster Oven. Keep children away from the appliance while it is in operation. Use oven mitts or tongs to handle hot cookware to avoid burns; Ensure the oven is placed on a stable, heat-resistant surface. Never leave the toaster oven unattended during cooking. Be aware of recalls, such as the French door model, which may pose risks due to unexpected door closures. Regularly inspect the power cord and plug for damage. Avoid overheating by not covering the oven vents. Follow the user manual for specific safety instructions tailored to your model.
2;2 Specific Safety Precautions for Oster Toaster Oven
Adhere to specific safety guidelines for the Oster Toaster Oven to ensure safe operation. Be aware of recalls, such as the French door model, which may have issues with unexpected door closures, posing burn risks. Always check your model against recall notices and follow the manufacturer’s instructions. Use oven mitts or tongs to handle hot racks and pans. Keep the oven away from flammable materials and ensure proper ventilation. Avoid overheating by not blocking the vents. Regularly clean food residue to prevent fires. If you notice malfunctioning parts, discontinue use and contact customer support. Stay informed about updates or safety notices for your specific model.
Product Description
The Oster Toaster Oven is a sleek, versatile appliance offering multiple cooking functions like toasting, baking, and convection cooking. Its compact design and efficient performance make it ideal for everyday use.
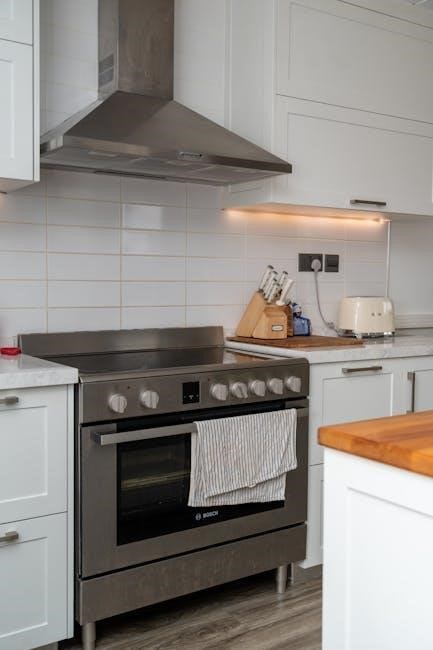
3.1 Design and Components of the Oster Toaster Oven
The Oster Toaster Oven features a sleek, compact design with a stainless steel exterior, ensuring durability and modern aesthetics. It includes a spacious cooking chamber, adjustable racks, and a drip pan for easy cleanup. The French door design, while convenient, has faced recalls due to unexpected closure risks. The oven is equipped with a digital control panel, offering precise temperature and timer settings. Internal lighting provides visibility during cooking, and the convection fan ensures even heat distribution. These components work together to deliver versatile cooking options, from toasting to baking, making it a practical addition to any kitchen.
3.2 Control Panel and Functions
The Oster Toaster Oven features a user-friendly digital control panel with intuitive buttons and a clear LCD display. It allows precise adjustments for temperature, timer, and cooking modes. The panel includes functions for toasting, baking, broiling, and convection cooking, ensuring versatility. The temperature range spans up to 450°F, and the timer can be set for up to 60 minutes. Additional buttons enable quick access to common settings, while the digital display provides real-time feedback. The control panel is designed for ease of use, making it accessible for both novice and experienced cooks to navigate and customize their cooking experience efficiently.
Operating the Oster Toaster Oven
The Oster Toaster Oven has a digital control panel for toasting, baking, and convection. Set temperature up to 450°F and timer up to 60 minutes.
4.1 Turning On the Toaster Oven
To operate the Oster Toaster Oven, ensure it is properly plugged into a grounded outlet. Press the power button to turn it on. Use the digital interface to select your desired cooking mode, such as toasting, baking, or convection. Adjust settings like temperature and timer using the control panel. Always preheat the oven before cooking for optimal results. Refer to the user manual for specific instructions on initializing the oven for the first time. Remember to follow safety guidelines, especially after recent recalls, to avoid any potential risks. Proper startup ensures efficient and safe cooking performance.
4.2 Setting the Temperature and Timer
To set the temperature and timer on your Oster Toaster Oven, use the control panel to navigate through the options. Select the desired temperature using the digital interface, ensuring it matches your recipe requirements. The timer can be adjusted by pressing the timer button and using the arrows to increase or decrease the cooking duration. Once set, press “Start” to begin the cooking process. The oven will preheat automatically and alert you when the cycle is complete. Always refer to the user manual for specific temperature ranges and timer limits to ensure safe and efficient cooking. Proper settings are crucial for achieving the best results.
4.3 Using Different Cooking Modes
The Oster Toaster Oven offers multiple cooking modes to suit various culinary needs. For toasting, select the toast mode and adjust the browning level. Baking mode is ideal for even cooking of cakes, cookies, and casseroles. Broiling mode allows for precise searing of meats and fish. Convection mode enhances airflow for crispy results, especially for roasted vegetables and fries. Each mode is easily accessible via the control panel. Refer to the user manual for specific settings and guidelines to ensure optimal performance. Proper use of these modes ensures delicious and evenly cooked dishes every time, making the Oster Toaster Oven a versatile kitchen companion.

Cooking Modes and Functions
The Oster Toaster Oven features versatile cooking modes, including toasting, baking, broiling, and convection. These functions provide precise control for achieving perfect results, ensuring delicious and evenly cooked dishes.

5.1 Toasting Mode
The Toasting Mode on the Oster Toaster Oven is designed for perfectly browning bread to your desired crispiness. It allows for even toasting of slices, ideal for breakfast or snacks. Recent recalls highlight the importance of safety, especially with models where doors may unexpectedly close, posing burn risks. Always ensure your appliance is not affected and follow safety guidelines. For optimal results, place bread evenly and adjust settings as needed. Regularly clean crumbs to maintain performance. Refer to the user manual for specific instructions on using the toasting mode safely and effectively, ensuring a great toasting experience every time.
5.2 Baking Mode
The Baking Mode on the Oster Toaster Oven is perfect for cooking a variety of dishes, from cakes to casseroles, with precise temperature control. Recent recalls emphasize the importance of safety, especially with models where French doors may unexpectedly close, posing burn risks. Always ensure your appliance is not affected and follow safety guidelines. For optimal baking, preheat the oven as instructed and use oven-safe bakeware. Adjust temperature and time based on the recipe and food type. Regular cleaning of the interior ensures even heat distribution. Refer to the user manual for specific baking instructions to achieve perfect results while maintaining safety and efficiency.
5.3 Broiling Mode

The Broiling Mode on the Oster Toaster Oven allows for high-heat cooking, ideal for searing meats, fish, and vegetables. Recent recalls highlight safety concerns with French door models, so ensure your appliance is safe to use. When broiling, preheat the oven and place food on the broiler pan for even cooking. Keep the door ajar for ventilation and monitor food closely to avoid burning. Adjust the timer and temperature as needed for perfect results. Always follow the user manual for specific broiling instructions to ensure safe and efficient cooking. Proper use enhances flavor and texture, delivering professional-quality dishes at home.
5.4 Convection Cooking Mode
The Convection Cooking Mode on the Oster Toaster Oven uses a built-in fan to circulate hot air, ensuring even cooking and browning. This mode is ideal for roasting, baking, and cooking meals faster. To activate, select the convection setting on the control panel and adjust the temperature and timer as needed. The fan distributes heat uniformly, reducing cooking time by up to 30%. For best results, pat dry foods before cooking to enhance crispiness. Always refer to the user manual for specific temperature guidelines and cooking times. Proper use of this mode delivers perfectly cooked dishes with a golden, crispy finish every time.

Installation and Setup
The Oster Toaster Oven requires careful installation and setup. Ensure all components are securely placed and follow the manual’s guidelines for safe operation and optimal performance.
6.1 Unpacking and Placement Guidelines
When unpacking your Oster Toaster Oven, carefully inspect for damage and ensure all components are included. Place it on a stable, heat-resistant surface, away from walls and flammable materials. Allow at least 4 inches of clearance on all sides for proper ventilation. Avoid placing it near water sources or in humid environments. Before first use, wash the shelves and racks with mild soap and dry thoroughly. Ensure the oven is placed on a flat, even surface to prevent tipping. Always follow the manual’s guidelines for safe and correct installation. This ensures optimal performance and safety during operation.
6.2 Initial Setup and Calibration
Before first use, ensure the Oster Toaster Oven is properly set up. Plug in the oven and allow it to heat for 10-15 minutes to eliminate any manufacturing smells. Set the clock if your model requires it. Calibrate the temperature by following the manual’s instructions to ensure accuracy. Check that all racks and shelves are securely placed. Familiarize yourself with the control panel functions. Ensure the doors are functioning smoothly and adjust if necessary. Refer to the manual for specific calibration steps, as they may vary by model. Proper setup ensures safe and efficient operation, maximizing your cooking experience.

Cooking Guide
Explore various cooking modes and adjust times and temperatures for optimal results. Use specific settings for toasting, baking, broiling, and convection cooking to achieve perfect dishes every time.
7.1 General Cooking Tips
For optimal results, preheat the oven before cooking. Use oven-safe cookware and avoid overcrowding the rack. Adjust cooking times and temperatures based on food type and portion size. Always refer to the user manual for specific guidelines. Keep an eye on your dishes during cooking, especially when using convection mode. Ensure proper ventilation in your kitchen. Clean the oven regularly to maintain performance. Follow safety precautions, such as avoiding loose clothing near the oven. Experiment with different cooking modes to achieve desired outcomes. Store leftovers promptly after cooking. These tips will help you make the most of your Oster Toaster Oven.
7.2 Cooking Specific Types of Food
When cooking specific types of food in your Oster Toaster Oven, consider the unique requirements of each dish. For meats, use the broil mode for even browning. Vegetables benefit from convection cooking for crispy results. Baked goods like cookies or bread require precise temperature control. Frozen foods, such as waffles or fries, should be cooked on the higher temperature setting. Delicate items like fish may need lower heat and shorter cooking times. Always refer to the user manual for specific guidelines. Adjust cooking times based on portion size and desired crispiness. Proper food placement on the rack ensures even cooking. Experiment with modes to achieve perfect results every time.
7.3 Adjusting Cooking Time and Temperature
Adjusting cooking time and temperature in your Oster Toaster Oven ensures optimal results for various dishes. Use the convection mode for faster, even cooking. Lower temperatures are ideal for delicate foods like fish, while higher settings suit meats and roasted vegetables. Always refer to the user manual for specific guidelines. For frozen foods, increase cooking time slightly. Keep an eye on your dish near the end of the cycle to avoid overcooking. If unsure, start with shorter times and adjust as needed. Proper temperature and time adjustments enhance flavor and texture, ensuring perfectly cooked meals every time. Experiment to find your ideal settings.
7.4 Troubleshooting Common Cooking Issues
Troubleshooting common cooking issues with your Oster Toaster Oven ensures consistent results. If food is undercooked, check the temperature accuracy and cooking time. For overcooked dishes, reduce the timer or lower the heat. Uneven cooking may require adjusting food placement. Ensure the oven is preheated and racks are correctly positioned. If the oven isn’t heating, verify the power connection and settings. Refer to the user manual for error codes and solutions. Clean the interior regularly to prevent food residue from affecting performance. Addressing these issues promptly enhances cooking efficiency and prevents recurring problems. Always follow safety guidelines when troubleshooting to avoid accidents.
Maintenance and Cleaning
Regular maintenance and cleaning are essential for optimal performance. Clean the exterior with a damp cloth and avoid abrasive cleaners. For the interior, wipe down with a mixture of water and vinegar after each use to prevent food residue buildup. Always unplug the oven before cleaning to ensure safety.
8.1 Cleaning the Exterior and Interior
Regular cleaning of the Oster Toaster Oven is crucial for maintaining its performance and hygiene. For the exterior, use a soft, damp cloth to wipe down surfaces, avoiding abrasive cleaners or scrubbers. The interior should be cleaned after each use by removing food residue with a mixture of water and vinegar. Avoid using metal scourers, as they may damage the finish. Always unplug the oven before cleaning to ensure safety. For tough stains, let the solution sit for a few minutes before wiping clean. Clean racks and trays separately in warm soapy water. Regular cleaning prevents grease buildup and ensures optimal cooking results.
8.2 Replacing Parts and Accessories
Replacing parts and accessories for the Oster Toaster Oven ensures optimal performance and longevity. Always unplug the oven before starting any replacement. For damaged racks, trays, or door seals, refer to the user manual for compatible replacements. Genuine Oster parts are recommended to maintain safety and functionality. To replace, remove the old part by following the manual’s instructions and install the new one securely. Door seals can be replaced by peeling off the old adhesive and attaching the new one. For complex parts like heating elements, contact Oster customer support or a professional. Regularly check and replace worn-out accessories to prevent performance issues and ensure even cooking results.
8.3 Regular Maintenance Tips
Regular maintenance is crucial for the Oster Toaster Oven’s longevity and performance. After each use, wipe the exterior with a damp cloth and clean the interior with a mixture of water and vinegar to remove food residue. Avoid using abrasive cleaners to prevent damage. Check and replace worn-out door seals to maintain heat retention. Inspect racks and trays for damage and replace them if necessary. Empty the crumb tray frequently to prevent buildup. For deep cleaning, unplug the oven and let it cool before scrubbing interior surfaces. Regularly check for software updates and ensure all parts are genuine Oster accessories for optimal functionality.
Troubleshooting Common Issues
Address common issues like uneven heating or malfunctioning controls by checking power connections and ensuring proper calibration. Refer to error codes in the manual for guidance.
9.1 Identifying and Solving Common Problems
The Oster Toaster Oven may experience issues like uneven heating or malfunctioning controls. Check power connections and ensure proper calibration. If the French doors unexpectedly close, as noted in recent recalls, stop use immediately. For error codes, consult the manual for specific solutions. Regular cleaning and maintenance can prevent many issues. If problems persist, contact Oster customer support for assistance. Always refer to the user manual for troubleshooting guidance to ensure safe and effective operation.

9.2 Resetting the Toaster Oven
To reset the Oster Toaster Oven, unplug it from the power source for 30 seconds to reset the internal controls. Plug it back in and test the functions. If issues like error codes or malfunctioning buttons persist, refer to the manual for specific reset procedures. In cases where the French doors close unexpectedly, as noted in recent recalls, stop use immediately and contact customer support. Regular resets can help maintain optimal performance and address software-related issues. Always ensure the oven is cool before attempting any reset or maintenance.
9.3 Error Codes and Their Meanings

The Oster Toaster Oven displays error codes to indicate specific issues. For example, “E1” may signify a temperature sensor malfunction, while “E2” could point to a door sensor problem. Understanding these codes helps in troubleshooting effectively. If an error code appears, refer to the user manual for detailed explanations. In some cases, like the recalled French door models, error codes may indicate safety risks, such as unexpected door closure. Always address error codes promptly to ensure safe and proper functioning. If unresolved, contact Oster customer support for assistance. Regular maintenance and adherence to safety guidelines can help minimize error occurrences.

Warranty and Customer Support
Oster offers a comprehensive warranty covering parts and labor for defective products. For inquiries or issues, contact their customer support team via phone or email for assistance.
10.1 Understanding the Warranty Terms
Oster provides a limited warranty for their toaster ovens, covering defects in materials and workmanship for a specified period. The warranty typically lasts for one to two years, depending on the model. It is essential to review the warranty terms to understand what is covered, such as repairs or replacements of faulty parts. Registration of the product may be required to activate the warranty. For detailed information, refer to the official Oster website or contact customer support. Proper use and maintenance, as outlined in the user manual, are often conditions for warranty validity. Misuse or normal wear and tear are generally excluded from coverage.
10.2 Contacting Oster Customer Support
Oster Customer Support is available to assist with inquiries, troubleshooting, and warranty-related issues. You can contact them via phone, email, or through their official website. Visit the Oster website and navigate to the “Contact Us” section for detailed information. Phone support is typically available during business hours, and live chat may also be an option. Ensure you have your product model number and purchase details ready for efficient assistance. For non-urgent matters, submitting a support ticket online is recommended. Oster’s customer support team aims to resolve issues promptly, ensuring a positive user experience. Always refer to the official website for the most accurate contact information.
The Oster Toaster Oven offers versatility and efficiency for home cooking. Always follow the manual for safety and optimal performance. Enjoy convenient and delicious meal preparation with ease.
11.1 Final Tips for Optimal Use
For the best experience with your Oster Toaster Oven, always follow the user manual guidelines. Regularly clean the appliance to maintain performance and safety. Experiment with various cooking modes to explore its full potential. Ensure proper food placement to avoid damage. Check for recalls, like the French door models, to ensure your unit is safe. Store the oven in a well-ventilated area and keep it out of reach of children. Refer to the manual for troubleshooting common issues. By adhering to these tips, you can enjoy efficient, safe, and delicious cooking with your Oster Toaster Oven for years to come.
11.2 Importance of Following the User Manual
Adhering to the Oster Toaster Oven user manual is crucial for safe and efficient operation. It provides essential guidelines to prevent accidents, such as unexpected door closures, which have led to recalls. Following the manual ensures proper use of features, avoiding damage and enhancing performance. Regular cleaning and maintenance, as outlined, prolong the appliance’s lifespan. Understanding safety precautions and cooking guidelines helps achieve optimal results. Referencing the manual for troubleshooting common issues saves time and prevents further problems. By following the manual, users can maximize their cooking experience while ensuring safety and longevity of the Oster Toaster Oven.